前置要求:
Windows 10或 Windows 11系统,支持WSL-linux子系统,CPU需要支持虚拟化,内存最少要求16G,无公网ip则需要一台境外云服务器
(活动链接99元一年,平时购买35元一个月):
【腾讯云】春季大促,助力开工,2核2G云服务器低至 68元/年
步骤 1 - 检查电脑系统版本
若要更新到 WSL 2,需要运行 Windows 10。或 Windows 11。
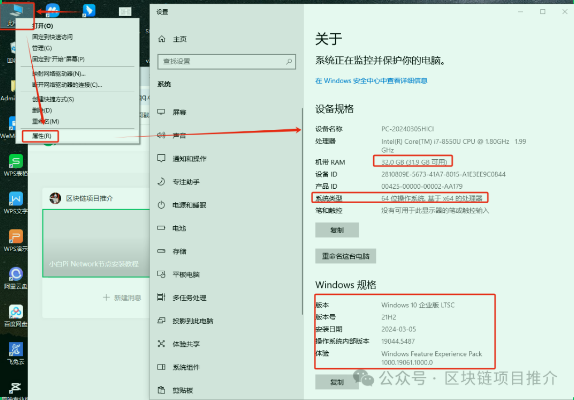
步骤 1 - 启用适用于 Linux 的 Windows 子系统
以管理员身份打开 PowerShell(“开始”菜单 >“PowerShell” >单击右键 >“以管理员身份运行”)
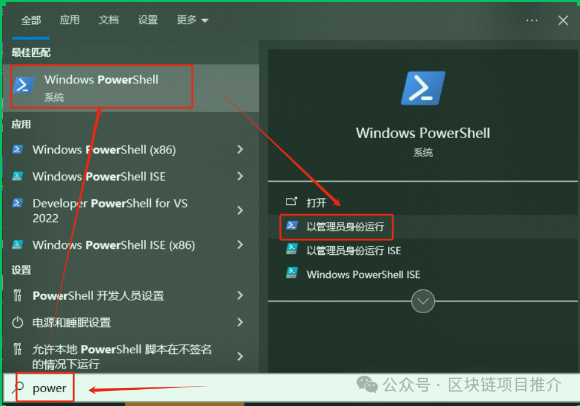
然后输入以下命令:
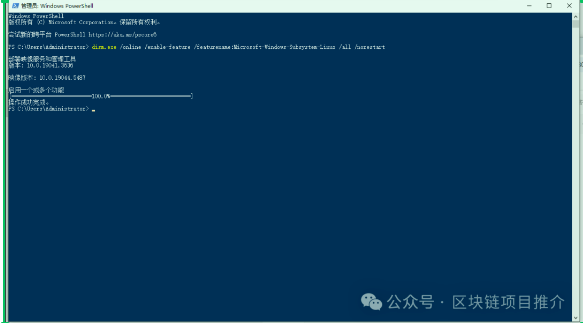
dism.exe /online /enable-feature /featurename:Microsoft-Windows-Subsystem-Linux /all /norestart
然后按键盘回车键查看子系统开启情况
步骤 3 - 启用虚拟机功能
安装 WSL 2 之前,必须启用“虚拟机平台”可选功能。 计算机需要虚拟化功能才能使用此功能。
PowerShell 界面 输入命令:
dism.exe /online /enable-feature /featurename:VirtualMachinePlatform /all /norestart
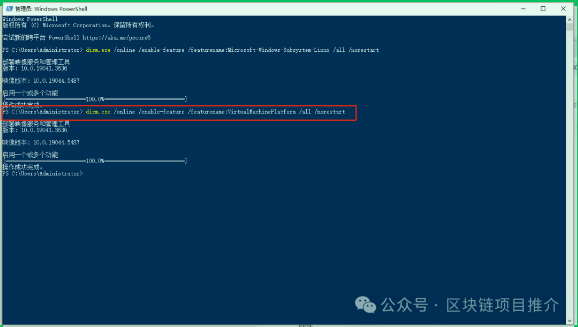
重启电脑
步骤 4 - 下载 Linux 内核更新包
Linux 内核更新包会安装最新版本的 WSL 2 Linux 内核,以便在 Windows 操作系统映像中运行 WSL。
下载链接:
https://wslstorestorage.blob.core.windows.net/wslblob/wslupdatex64.msi
运行上面下载的安装包。 (双击以运行 - 系统将提示你提供提升的权限,选择“是”以批准此安装。)
安装完成后,请继续执行下一步 - 在安装新的 Linux 分发时,将 WSL 2 设置为默认版本。
步骤 5 - 将 WSL 2 设置为默认版本
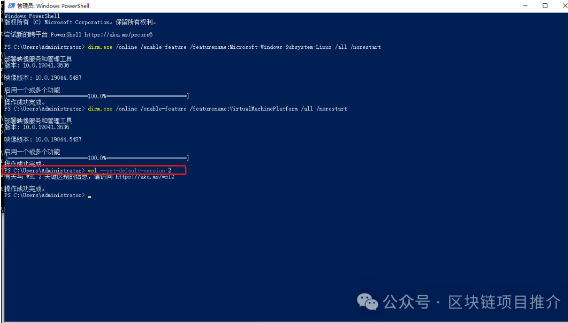
PowerShell 界面 执行命令:
wsl --set-default-version 2
重启电脑
步骤 6 - 下载安装Docker Desktop,https://desktop.docker.com/win/main/amd64/Docker%20Desktop%20Installer.exe?utmsource=docker&utmmedium=webreferral&utmcampaign=dd-smartbutton&utmlocation=module&gl=11ocq7vqgclauNTM3MzEwMzc4LjE3NDEwMTI0Mjk.gaNDAyMjIxMTEuMTcxMjgxOTQ5Nw..gaXJWPQMJYHQ*MTc0MTAxMjA4MS44LjEuMTc0MTAxMjQyOS42MC4wLjA.
鼠标右键管理员方式运行上面下载的安装包进行安装。
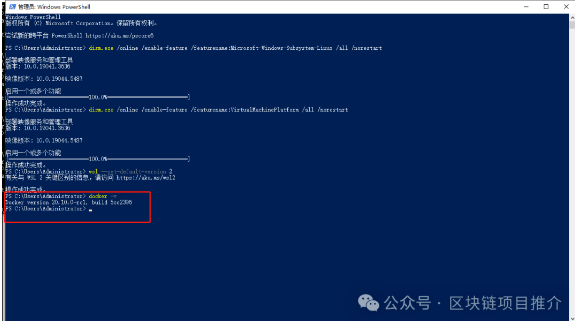
通过查询版本,确认安装完成,PowerShell 界面 执行命令:
docker -v
步骤7.Docker Desktop修改镜像站
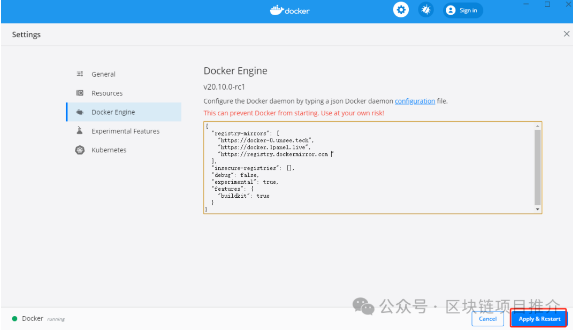
打开Docker Desktop,进入设置界面
复制下面的代码,粘贴到上图的位置
{ "registry-mirrors": [ "https://docker-0.unsee.tech", "https://docker.1panel.live", "https://registry.dockermirror.com" ], "insecure-registries": [ ], "debug": false, "experimental": true, "features": { "buildkit": true } }
点击Apply & Restart重载配置
步骤8. 购买云服务器
(活动链接99元一年,平时购买35元一个月):
【腾讯云】春季大促,助力开工,2核2G云服务器低至 68元/年
https://cloud.tencent.com/act/cps/redirect?redirect=6425&cps_key=567d423eca30d6487d1fe69e336e018c&from=console
小白推荐使用Windows系统版本
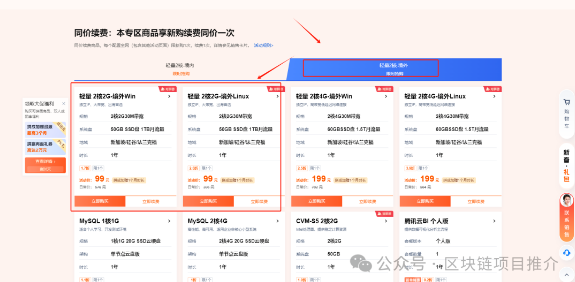
购买以后:在控制台查看服务器ip,在消息中心查看登录密码。
步骤9.在服务器和本地电脑都下载frp 0.36.2版本
下载连接:
https://github.com/fatedier/frp/releases/download/v0.36.2/frp0.36.2windows_386.zip
服务器启动服务端程序,监听端口
控制台执行
frps.exe -c frps.ini
开启端口监听
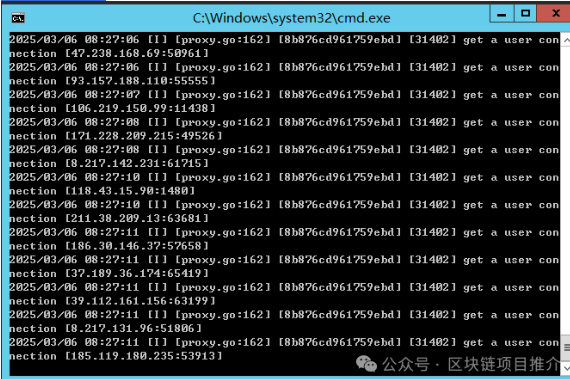
本地电脑启动客户端程序,映射端口
文本打开frpc.ini文件,复制下面的代码
Plain Text
[common]server_addr = 你的服务器ipserver_port = 7000[31400]type = tcplocal_ip = 127.0.0.1local_port = 31400remote_port = 31400[31401]type = tcplocal_ip = 127.0.0.1local_port = 31401remote_port = 31401[31402]type = tcplocal_ip = 127.0.0.1local_port = 31402remote_port = 31402[31403]type = tcplocal_ip = 127.0.0.1local_port = 31403remote_port = 31403[31404]type = tcplocal_ip = 127.0.0.1local_port = 31404remote_port = 31404[31405]type = tcplocal_ip = 127.0.0.1local_port = 31405remote_port = 31405[31406]type = tcplocal_ip = 127.0.0.1local_port = 31406remote_port = 31406[31407]type = tcplocal_ip = 127.0.0.1local_port = 31407remote_port = 31407[31408]type = tcplocal_ip = 127.0.0.1local_port = 31408remote_port = 31408[31409]type = tcplocal_ip = 127.0.0.1local_port = 31409remote_port = 31409
控制台执行
frpc.exe -c frpc.ini
开启端口映射
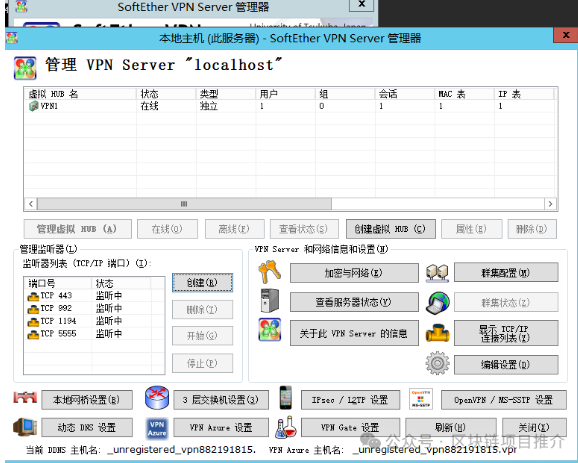
步骤10. 在云服务器上 下载SoftEther VPN Server
下载链接:
https://www.softether-download.com/files/softether/v4.43-9799-beta-2023.08.31-tree/Windows/SoftEtherVPNServerandVPNBridge/softether-vpnservervpnbridge-v4.43-9799-beta-2023.08.31-windows-x86_x64-intel.exe
设置代理服务器,创建用户,配置DHCP动态服务
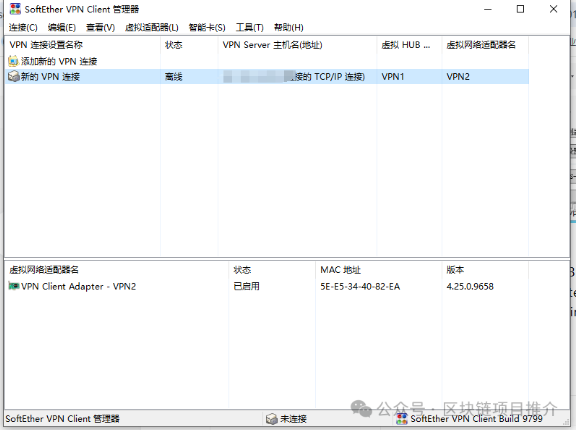
步骤11.在本地电脑上 下载SoftEther VPN Client
https://www.softether-download.com/files/softether/v4.43-9799-beta-2023.08.31-tree/Windows/SoftEtherVPNClient/softether-vpnclient-v4.43-9799-beta-2023.08.31-windows-x86_x64-intel.exe
创建VPN虚拟网口,连接VPN服务器
(输入在服务器创建的用户名和密码)
步骤8.下载Pi节点客户端
登录pi授权
步骤9.检查节点环境
步骤10.启动节点,同步数据


网友留言